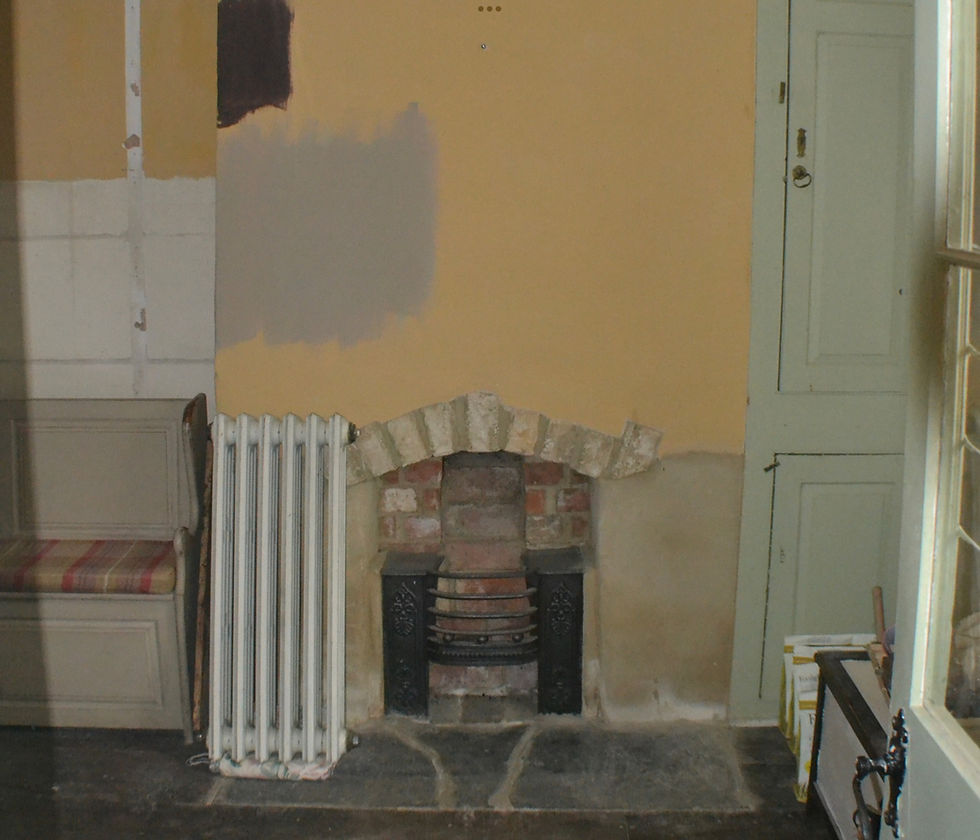
This fireplace is an example of one that was removed and sealed up at some point during its history. It was later uncovered (within last 10 years) and a replacement was built in. Sadly, the brick elements were built with a cement mortar which alone would significantly affect the wall's ability to deal with moisture. A grate has been built into the cavity, though it's broken and incomplete. A course cement mix was applied to the left and right side of the fireplace. An effort was made to create a decorative stone lintel. There was a section of wall to the left of the fireplace with a course cement plaster/render which had signs of damp including mould and peeling paint and plaster. The damp could be attributed to the garden bed on the external of the wall which is raised and sits against the house.

The dismantling:
The plaster was removed from the entire wall including around the fireplace. The grate and bricks were also removed with the stone lintel - all inappropriate later additions. Existing brick repairs can be seen across the chimney breast.
The First Coat:
This job starts with the dubbing out of the wall. This is when more sizable depressions in the wall are made up to prevent areas of the first coat from being too thick. We decided to use a hot mixed plaster for this job as quicklime is a more breathable lime option. There was also a small section of ceiling repair directly above the fireplace due to the damp in the wall rotting immediate sections of lath - yet another example of non-breathable materials causing damage to adjacent sections of historic buildings.
Fireplace Insert:
This particular cast iron insert is actually a reproduction. It was installed between the first two coats so that the mantle could be plastered in.
The gap behind the insert needed to be filled so that debris from the chimney could gather at the insert opening and be brushed out instead of gathering in the cavity. This was done in the traditional fashion with broken bricks and a sharp lime mortar then capped with a sharp lime mortar.

The final coats:
It took 3 months for sections of the second coat to dry out sufficiently. This was due to the amount of moisture that was held in the wall by the non-breathable gypsum plaster. The mantle was fitted with the second plaster coat and a third coat applied afterwards. Now that it's finished in quicklime, it is breathable and will allow moisture in the wall to leave, to then be ventilated out of the property.


That's an absolutely superb job. From one professional to another.